Brew Gourmet Coffee Anywhere Using Basic Tools
As mentioned in my previous rant on Instant Coffee, I wanted to put together an article about how to easily brew bistro quality coffee using very basic equipment.
So here it is!
This thing is, you don’t need to have fancy equipment to make some of the best coffee anyone has ever tasted.
And you don’t need to be a barista.
I’ll show you the best, super-easy ways to make gourmet coffee. I’ll show you how to grind the beans, filter out the grounds, and show you some super low-tech tools that can be used.
Almost always, If you can get your hands on whole coffee beans, you can make gourmet coffee regardless of the situation or environment.
To be clear: You can make a premium cup of coffee guerrilla-style outside on the ground with a campfire, rock, pan, and a t-shirt; that rivals anything found in a Manhattan coffee house.
Brewing Methods
There are many fascinating coffee brewing methods, but I have limited this article to ways that produce high quality coffee and are easy to accomplish virtually anywhere.
For example, I’ll skip cowboy coffee because although super easy, it does not produce gourmet quality. (fyi, cowboy coffee is when you cook the ground coffee in a pot of water and don’t even filter out the grounds, yuck)
Likewise, we’ll also leave out more sophisticated methods like the vacuum pot syphon that produces a high quality cup but requires equipment that is not easily procured or reproduced on the fly. (Unless you are a mad scientist or something)
I’ve also eliminated the French press because although super easy, the metal filtering process leaves a chalky residue in the finished product, which is why one rarely finds this method employed in coffee houses.
Sorry, French press lovers. The French press is out!
For this article we’ll stick to the following tried and true, no-fail methods.
- Pour-over
- Cold Brew
- Bonus: Cafe Americano / Latte (espresso-based coffee)
Each of these methods brings out the rich flavor of the coffee beans, but in slightly different ways. Give each a try and see what you prefer.
We’ll cover the basics first and then get into details about grinding and filtering. Let’s take each one at a time:
The Pour-Over Brewing Method
The Pour-over method is very popular in coffee houses today because it produces a clean and delicious cup of coffee that can be made 1 cup at a time if desired.
The method involves placing the grounds into a filter positioned above a container.
Hot water is slowly poured over the grounds, and the finished coffee drips through the filter and into the container.
Grind the beans (medium grind). See the section below on grinding.
Position either a paper filter, layers of cheesecloth, or a piece of cotton (such as a tee shirt) over a glass container. A wide-mouth glass pitcher works great. (metal is OK to use but glass is preferable, and definitely no plastic).
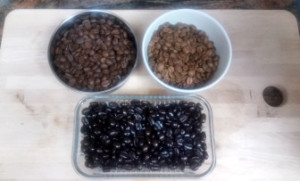
Plan to use 1-2 tablespoons of ground coffee per finished cup of coffee. The baggie of beans in the picture made 2 cups of coffee. Experiment with the ratio until you achieve the perfect cup to your taste.
Bring the water to a boil and then let it cool down for a couple of minutes. A temperature of about 185 to 190 degrees Fahrenheit is desirable, which is just below the boiling point, so it is not necessary to use a thermometer, but use one if you want to.
Pour the hot water slowly over the ground coffee. Let the wet grounds sit in the filter for about a minute and then continue to pour the water slowly over the grounds. The coffee should be dripping into the container.
It is a good idea to stir the coffee at this point. Continue to pour the water over the coffee until the desired strength is produced — too much pouring will result in a weak brew. Once again, experiment with the ratio until you get it just right.
Remove the filter being careful not to spill any grounds into the container.
Serve the coffee as desired.
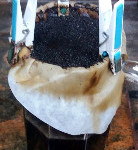
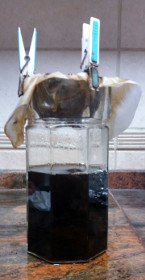
Pro Tip: If you discover that the pour-over brewing method is going to be your main brewing method going forward (and you probable will) upgrade to a Chemex pot and use their white paper filters. Pair it with a goose neck electric kettle with a temperature setting if you want to get really fancy.
The Cold Brewing Method
The Cold brewing method in my opinion produces the most flavorful coffee and is super easy to do. The drawback is that it takes some planning in advance because the coffee has to steep in cold water overnight before filtering.
One good thing about cold brewing is that very large batches are just as easy to produce as small batches.
Iced coffee lovers will definitely want to use this method, but this style is also a must-try for hot coffee drinkers as well.
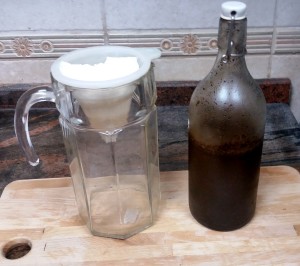
Grind as much coffee as desired and scoop it into a glass pitcher or bottle. (In the photo I used the bottle with a tight stopper-style top.
Pour fresh cold water over the grounds. The ratio I find to be the best is 1:1 water to coffee grounds. This will make a very strong coffee which is great for iced coffee, but can also be used as a base for hot coffee.
Vigorously stir or shake the mixture, cover, and place in the refrigerator overnight. (you could place it somewhere else cold such as a creek or cooler)
The next morning, set up a quick filtering process. A paper towel and a funnel will work. A tee shirt or cheese cloth works even better because it can be squeezed.
Position the filter over the desired container. {Note: the filtering will take more time because there is a higher ratio of grounds to water in this method. Because of this, you could run it through a strainer first prior to filtering to remove the majority of grounds.}
Pour the cold brew into the filter a little at a time until all of it is processed.
The resulting cold coffee can be used as-is for iced coffee. Sweeten your iced coffee with a simple syrup (1 part sugar and 1 part water dissolved in boiling water and then cooled.) Make up a batch of simple syrup ahead of time to use for sweetening iced coffee.
For hot coffee, fill a mug 1/4 to 1/2 full with the filtered cold brew and top off with very hot water (not boiling water). The water will dilute the coffee to the desired strength while instantly bringing it up to temperature.
Enjoy. The cold steeping method brings out flavor notes that cannot be produced in quick brew methods.
Bonus: The Cafe Americano / Latte Method
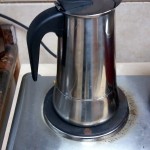
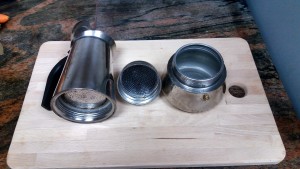
This method requires a specialized tool known as the stovetop espresso maker.
These specialty metal pots are small, cheap, lightweight, and can be found almost anywhere in the world. They can be easily packed into camping gear or luggage. I have included this method because it produces a pretty decent cup of coffee that is easy to make, even on top of an open fire.
The idea here is to make a small batch of espresso and convert it into what approximates a regular cup of coffee, known as the Cafe Americano.
Fill the bottom chamber (the bottom screws off) of the stove top espresso pot with fresh cold or room temperature water.
Place the removable metal coffee filter on top of the water chamber and fill it with finely ground coffee.
Tamp the coffee down using whatever you can find for this purpose. I often use the bottom end of a small jar. In other words, fill the filter with the coffee grounds and pack the coffee down by pressing it with a flat round object. Pretend you are pushing down on a floor scale and push until the needle would register at about 25 pounds.
You can buy a tamper if you want to.
Screw the bottom chamber tightly back into place and set the espresso maker onto the stovetop or equivalent heat source (a grill for example). As the water in the bottom chamber heats up, it will be forced upwards through the tamped grounds and into the top chamber.
Once all of the water has been converted into espresso (you can carefully lift up the lid to check to see that it is finished) remove the espresso maker from the heat source.
At this point, you have a small pot of espresso that can be enjoyed that way, or converted into a Cafe Americano.
To make the Americano, fill a mug about 1/4 full with espresso and top off with hot water. Using milk instead of water would produce a latte.
Make someone a latte on a camping trip and they will freak out. Heck, make them a pour-over or a cold brew coffee also.
Grinding Coffee Beans
To produce a good cup of coffee it is important that you grind the beans just prior to brewing the coffee.
I’m sorry, but it is true: you must not ever buy ground coffee!
This seems to be the major obstacle that stops people from making their own great coffee. They do not want to go down the road of grinding their own beans, but if one does not get into the habit of grinding beans, one cannot make good coffee, period.
Luckily it is extremely fast and easy.
You do not need a $1,000 burr grinder from Italy to make a coffee house quality cup of coffee.
However, it is true that a better grind produces a better finished product because high quality grinders chop up the beans into equal sized pieces.
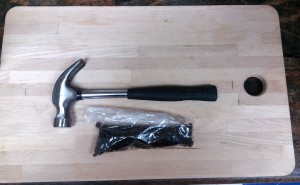
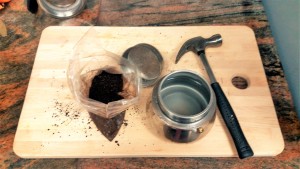
Having said that, I have made extremely good coffee grinding beans with a hammer and plastic bag. In fact, if you have never tried this, please do so.
With that in mind, here are some ways to grind your own beans:
- Mortar and Pestle
- Plastic bag and a blunt object (hammer, rolling pin, a rock, etc.) {substitute a t-shirt or anything else for the plastic bag if desired}
- Hand-crank coffee mill or spice grinder
- Blender
- reasonably priced burr grinder
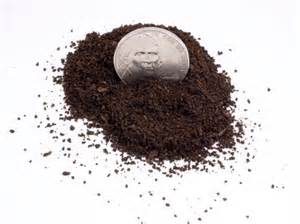
When grinding, if you see pieces that still resemble coffee beans, you need to keep pounding. There should be no shards of bean left in the grind.
About 2 minutes of light pounding does the trick for a medium grind.
For the first 2 methods mentioned above, you’ll want to shoot for a medium grind. For the espresso method, you should grind as finely as possible. Grinding coffee very finely using a manual method takes more time and practice, but can be done.
Filtering
For cold filtering, I recommend the cheese cloth, or white tee shirt.
For hot filtering, I recommend using cheap filters from the grocery store if available but, if not, use a clean cotton t-shirt (yes it works, I have used it many times).
You could also sew together your own reusable coffee filters using a couple sheets of cotton (obviously you want to avoid dyes and chemicals wherever possible).
Cheesecloth has been the traditional way to filter things for hundreds of years and will definitely work–just make sure you have enough layers so the grinds are not getting through.
Twist the cheesecloth to speed up the process for cold filtering. Metal strainers are to be avoided as they let too much of the powder from the grind into the finished product.
Additional Tips
Water: obviously use the freshest clean water available. If you have to boil water for a while to sanitize it, let it cool below the boiling point before running it through the grounds to avoid scorching the coffee.
Warming coffee back up: If you have a batch that gets cold and you want to warm it back up to drink, the best way is to slowly bring it up to temperature on the stovetop (do not let it get to a boil). Resist the temptation to use a microwave. The nice thing about espresso and the cold brew method is that since you only use a little of the strong stuff as a base, the warming can be accomplished by diluting with hot water.
Thanks for reading, and please share this article if you found it helpful.
