How to Grow Sweet Corn in your Backyard, an A to Z Guide

Tips and Methods of Growing, Caring for, and Harvesting Sweet Corn
Sweet corn is a rewarding crop that comes with many benefits. It can be served as a healthy snack, a salad side dish, or be used for medicinal purposes. If you enjoy fresh fruits and vegetables, corn will make a perfect addition to your garden.
The planting, growth and harvesting of corn all take great effort and commitment. But if you’ve decided to give it your best shot, then you’ll most likely be enjoying your own garden fresh corn in the spring. In this guide we have you covered from A to Z.
Usually, homeowners aspiring to grow crops are puzzled not knowing where to start, therefore, we’ve provided some some easy-to-follow tips, and thorough instructions that will guide you through every step of the way.
Preparing for the crops
There are many things that must be factored in before cultivation begins. First and foremost, you should learn enough about sweet corn to proactively avoid any hurdles that you can face. Corn is very susceptible to frosts, and if you end up planting seeds during that season, or too early into the spring season when frost has only just ended, the chances are you’ll ruin your plantation.
Corns are best planted in the spring, at least two weeks after the last frost date since they are very intolerant to cold. The seasonal frost varies depending on the area you live in. In southern area, it may subside faster than that of the northern side.
Your soil must be above 60 degrees because you will not be able to establish seeds in a cold soil. Also, make sure the temperature doesn’t plunge below 60 degrees continuously (by using a black earth cover) as that would prove challenging to sustain growth. In the case of encountering a surprise frost when your seeds are germinating underground, you can cast a garden plastic sheet to keep them warm.
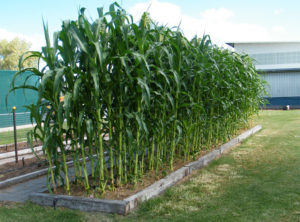
The area for cultivation must be prepared in a way that caters to the specifics of growing corn. It must be sunny and patterned in a way that enables wind pollination.
Since corn is wind-pollinated, it should be planted in large plot grids. If you’re planting different varieties of corn, use larger grids and separate them so cross pollination doesn’t occur.
Identify the best possible area in your garden that sufficiently draws sunlight and doesn’t run the risk of losing moisture to other plants in its surroundings. You can stretch boundaries around an area of four feet by four feet.
The next thing to do is nourish the soil with fertilizers, and natural compost like leaves and organic matters. Compost provides the soil with nutrients and helps retain moisture. Clear the soil of any other plants and weeds by uprooting them thoroughly.
Weeds can absorb water away from the corn seeds, causing them to dehydrate and lose nutrients. Maintain a neutral pH of 5.8-6.8 and water generously after plantation. The stronger and rich your soil is the greater and flavorful the yield will be. This process also benefits the garden as a general lawn care routine.
Sowing the seeds
Before planting the seeds, it is a great idea to soak the seeds overnight in tepid water. This speeds up the germination process by allowing seeds to absorb water before they are buried into the soil.
Plant the seeds straight creating four rows, and each seed about 12 inches apart from one another. Put in the seeds 1 ½ inches deep into the soil and cover them with soil. Water the seeds right after you plant them until the soil appears rich and dark.
Caring for the crops
Maintain a rich supply of water to the plants and take steps to retain the moisture in them as much as possible. Keeping the seeds hydrated at all times is vital for them to grow, especially, considering that corns have roots that are susceptible to drought; so water them as necessary throughout the process.
6 weeks into the germination process you will see tassels growing out. During this time you will have to make sure the space between the seeds is maintained by thinning out the leaves that have grown. At this point, you should also fertilize the ground again.
Look out for any indications for damaged growth. If your plants display a light yellow color instead of dark green then fertilize the soil with an adequate amount of fertilizers.
Harvesting crops
When it’s time to harvest you’ll look out for the following signs:
Check the ears for ripeness. Examine the silk of the corn three days after it has emerged from the ears; it should be dry and light brown.
Pierce a kernel of corn with your finger by peeling off a little from the husk to check its ripeness. If it isn’t fully ripe cover it with the husk again. A ripe kernel will show a white creamy texture when popped.
The husks of the corn should be tightly folded, green in color and plump and firm in texture, whereas the corn silk should be dark brown as opposed to yellow.
It is crucial that you harvest your corns during the optimal harvest period, because the sugar turns into starch quickly after the corn becomes fully ripe. Also, sweet corn must be consumed within two days of being harvested for a rich, flavorful taste.
If you want to have a fresh supply of corns for a longer period, plant each grid of corn seeds at 2-week intervals.

There is a rich variety of corn seeds that you can choose from. Once you start growing your own corn, you’ll be excited to try out as many types of corn as possible. Each type of corn has a varying preparation and growth method. So, plant them carefully to yield a delicious harvest!
Author Bio : Sarah has loved gardening and nature since childhood. She loves to read about new plants and gardening tips. She works for “YourGreenPal” which helps you to quickly find, schedule and pay for Lawn Care Services.
Thanks for reading, and please share this article if you found it helpful.